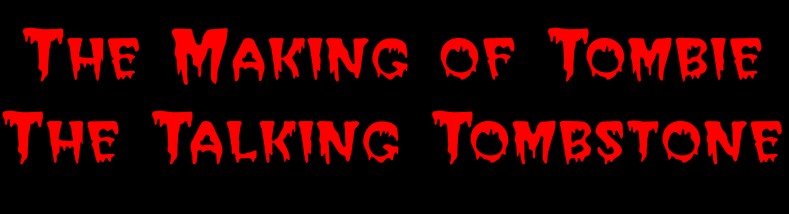
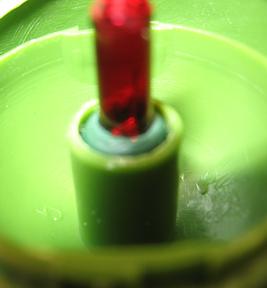
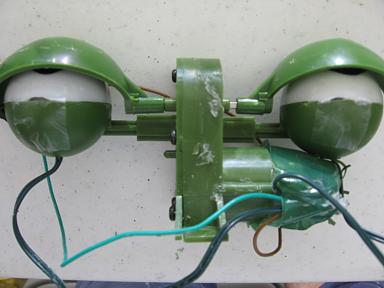
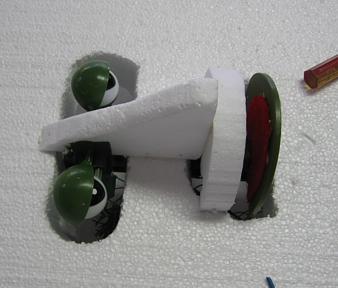
I did not like how the taking Fir's eyes lit up green (that is real scary for Halloween). I had some extra red bulbs but as you can see there was a size difference.
The bulb sticks up too high so that you can't get the eye back on. I didn't take the time to see if there were shorter bulbs. If you can find them then less work.


I got the idea for making the talking tombstone from the following to locations. (Thank You)
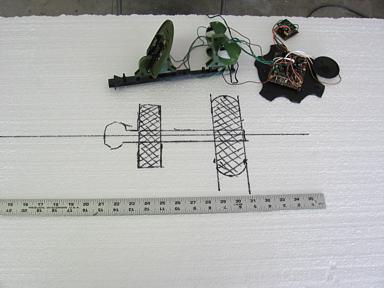
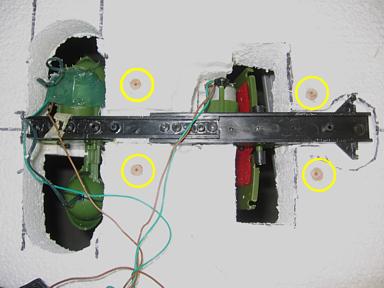
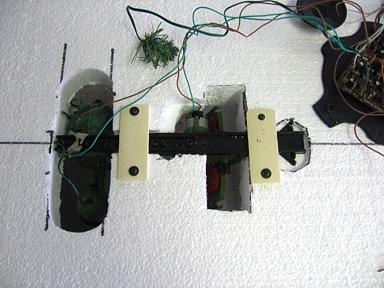
The below link has great directions for taking apart a talking fir tree
The following is just a guideline on how I made Tombie the Talking Tombstone. I wish you luck if you try to build your own talking tombstone or sign. They are a great addition to any haunt and worth the effort to build. I used a 2' x 4' piece of 2" thick Styrofoam that I cut out the way I wanted before adding the talking fir. There are many web sites that explain how to make a tombstone out of Styrofoam.
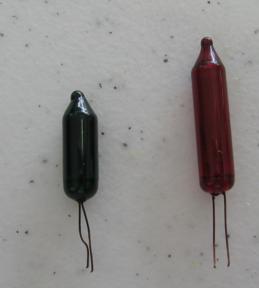
Using a Dremel tool I removed lip that was held the bulb socket in place. Remove a little at a time and test to see if you have the bulb low enough. Care needs to be taken as not to damage the wires.
As you can see the bulb is now low enough to put the eye back on.
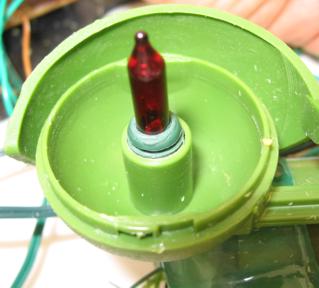
When I originally took the eyes off the little tab piece broke off. I used a little Elmer's glue and tape to hold the eye in place. There is most likely a better way to remove the eyes that I was not aware of
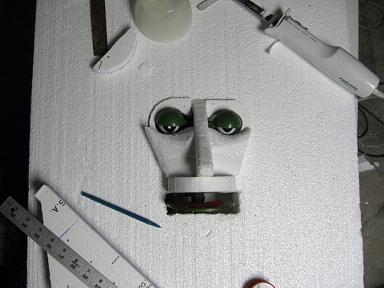
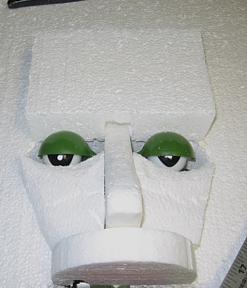
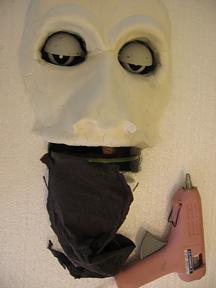
The next step is to cut an opening in the 2" Styrofoam for the eyes and mouth to go through. I wanted to be able to remove the talking fir without disturbing the whole face when completed.
I used an electric jig saw to cut the holes out but a hack saw blade can be used too.
More of the Styrofoam had to be cut out for the motor that controlled the mouth flap. A router was used to create a recess so the complete talking fir was be flush with the Styrofoam.
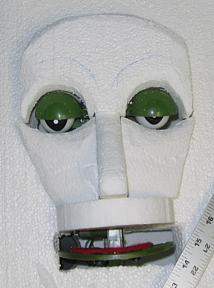
Next wooden 1.75" long dowels were glued (liquid nail) in place. Before gluing them in I drill a small hole in the center. This puts less stress on the Styrofoam when you finally install a screw.
A cut down paint stirring stick was used to make the hold down straps.
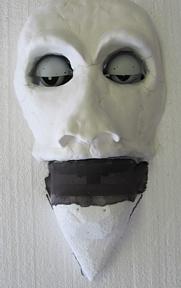
1" thick Styrofoam to make the upper lip and nose bridge. Liquid Nail was used to them onto the 2" Styrofoam. Tooth picks were pushed down into the Styrofoam to help hold them in place.
The cheeks were cut out from a block of 2" Styrofoam using an electric knife. The key is to make small cuts at a time until you get your desired result. The more you can shape now the less clay you will need later.
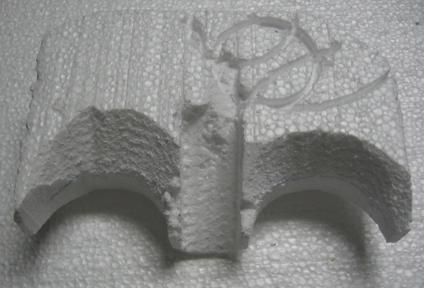
For the top of the head I once again started out with a block of 2" thick Styrofoam. The key once again is to make little cuts at a time and then trial fit.
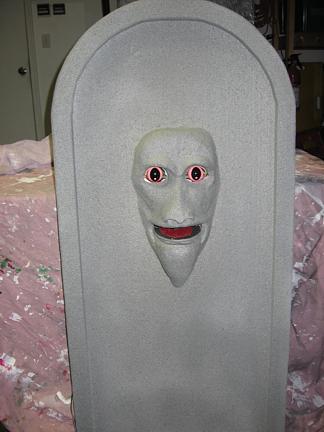
Here is the final result.
Here is what the back of forehead looks like. Note the recesses were the eyes go to allow movement of the eyelids.
The last 2" Styrofoam block was shaped for the chin. Once all the the pieces fit together everything was glued in place with Liquid Nail.
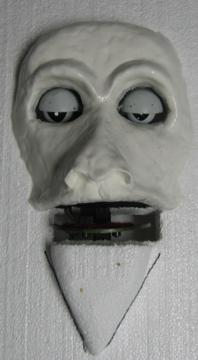
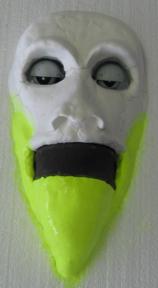
Crayola Magic Clay was used to make the face. This stuff is great to work with! At the end I use a small amount of water to smooth the clay. Before I put the clay on I painted the eyelids and the inner part of the mouth.
I used nylon stocking to allow for mouth movement. One part of the nylon stocking was hot glued to the lip flap.
The next step is to glue the other part of the nylon stocking to the chin. You want to stretch the nylon enough as not to impede the action of the mouth.
Bathroom Latex caulking was used to fill in cracks that had developed once the clay dried.
Here is the final face using more Magic Clay. The store ran out of white so I had to use yellow. No big deal because the face and Styrofoam will be painted with Latex gray as a base.
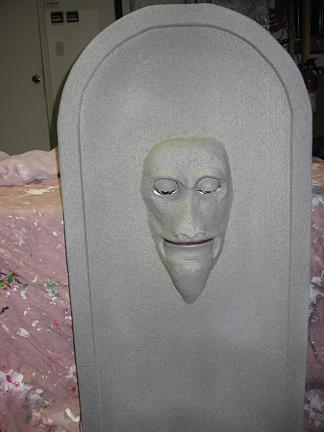
After putting down the Latex gray base I sprayed the tombstone with American Accent stone effect paint from Home Depot. The above photo was taken before the paint fully dried. After it dried I did loose some movement in the mouth (see video). In the end the use of a latex sheet may have worked out better than the use of a nylon stocking. Over all still not bad!
I hooked Tombie to a laptop and used prerecorded WAV files to make him talk. This allowed him to interact with the Magic Mirror. Kids just loved this!

The electrical circuitry was hot glued to the back of the Styrofoam. The speaker was placed over the opening as not to muffle the sound.
You may email your questions to ewhs1983@aol.com
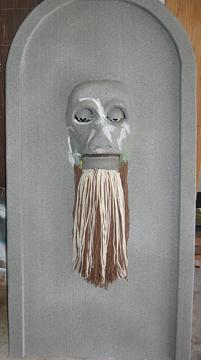
In 2006 Tombie grew a beard
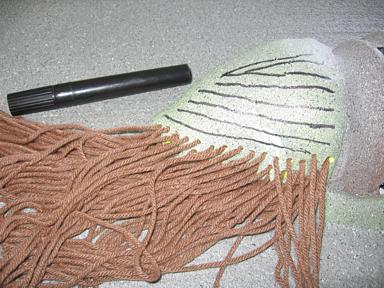
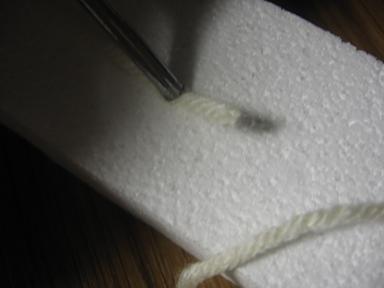
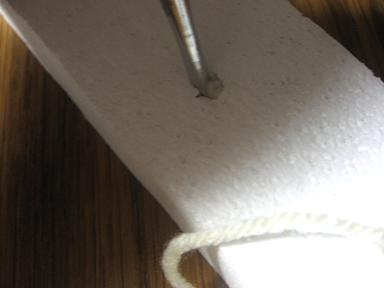

First glidelines were drawn for placement of the yarn. The yarn was inserted about 1/4" apart from each other.
A small wooden dowel or lollypop stick can be used to push the yarn into the Styrofoam. You want to have about a 1/2 of yarn sticking out from under where you want to push the yarn into.
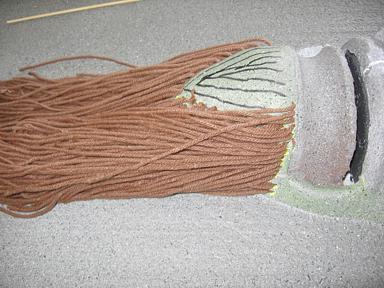
Then push straight down with the dowel or stick until the 1/2" part of the yarn in pushed into the Styrofoam. Practice on a spare piece of Styrofoam until you get the technique down.
Above is the finished product. If the yarn doesn't feel secure then you can quirt a little bit of Elmer's glue into the hole. Since I was going to paint the yarn I knew that would hold it in place.
The beard is starting to take shape. Every other row I staggered the alignment of the row below it.
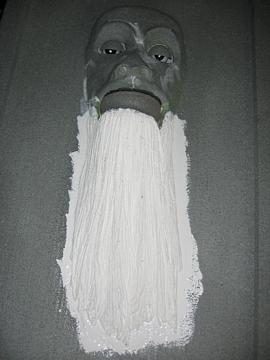
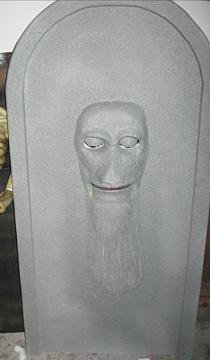
The picture to the right shows the beard. I trimmed the bottom using a pair of scissors to the shape I wanted. The middle picture shows three heavy coats of paint used to hold all the yarn in place (I used white as I had very little gray paint at the time). After putting down a final Latex gray base I sprayed the beard with American Accent stone effect paint from Home Depot. The picture on the left shows a finished Tombie with his new beard.
Perron Halloween Productions copyright 2007-2009